
-
Contents INTAKT CMS
Edit images
Insert an image
It is possible to insert an image in a text block: Move your cursor to the position you want to insert the image.
- Click on "Insert/Edit image" at the right top of the text block menu bar (image of a tree)
- A new window will come up showing the tab page "General".
- The tab "General" contains a search-button (see the red square in the image below)
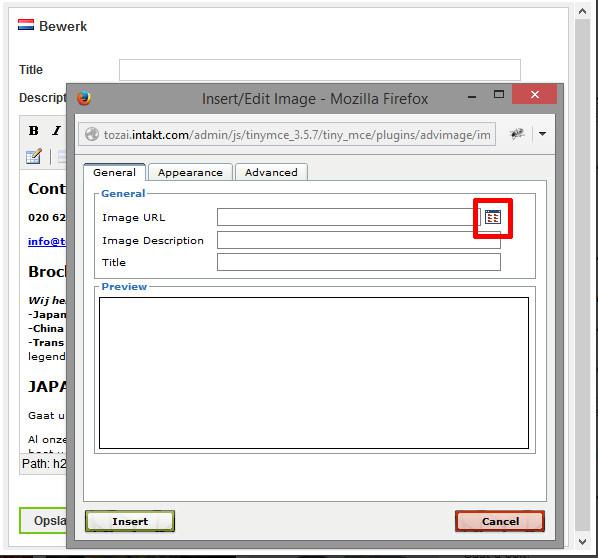
- A click on this button will open another window that let you manage files on the server. Click on a folder to open it. Navigate back clicking on folder ".."
- If you need to upload the image to the server, use the upload form at the bottom.
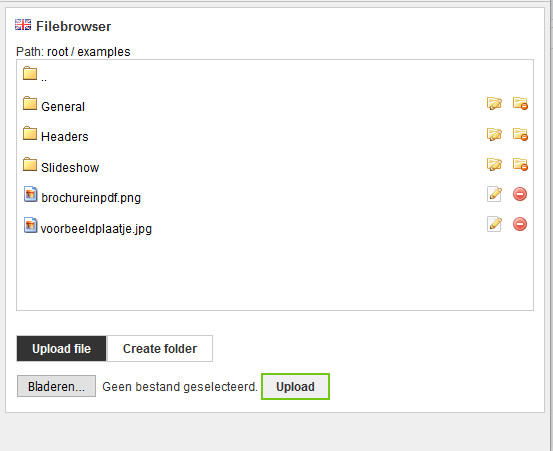
- Navigate to the image you want to insert, and click to select. The window will close, your image will appear in the preview block of the window underneath.
- Finally, adjust the aligning of the image to your needs. In tab "Appearance", select the alignment form the dropdown. For example "Right".

- Tip: At the right of this window a preview of the alignment is shown.
- Other adjustments will be explained in the next chapter.
- Click "Insert" and the image will be inserted into the text you were editing.
Adjust images in text
We can adjust the layout of images that were inserted into text.
First, select the image. Handles will appear around the image. The size can be adjusted by dragging these handles. The "Insert/edit Image" button will be activated (the image of a tree). This button will take you to a window where the image properties can be adjusted.
Adjusting the size of your image is possible in two ways:
By dragging the "handles" after selecting the image:

And by using the "Insert/edit image" button. Navigate to the "Appearance" tab in the edit image window to view the options.
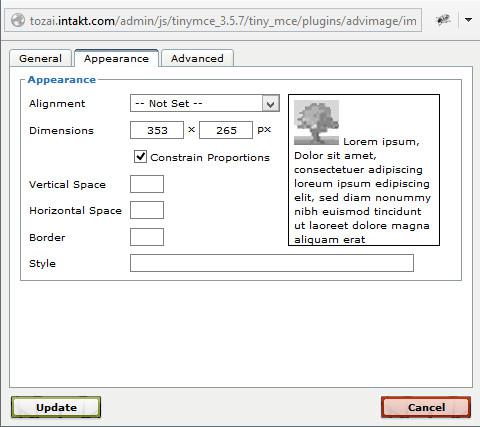
Dimensions: Adjust the image dimensions in pixels. (The image will be displayed at the size you request, but the image file on the server and it's size will not be affected by this.)
Alignment: set the alignment of the image. (left/right/middle)
Horizontal/Vertical space: Set a margin around the image.
Border: draw a border around the image.
Style: add extra css style to the image. Only of interest when you are familiar with using css.
The "Update" button will save your adjustments.
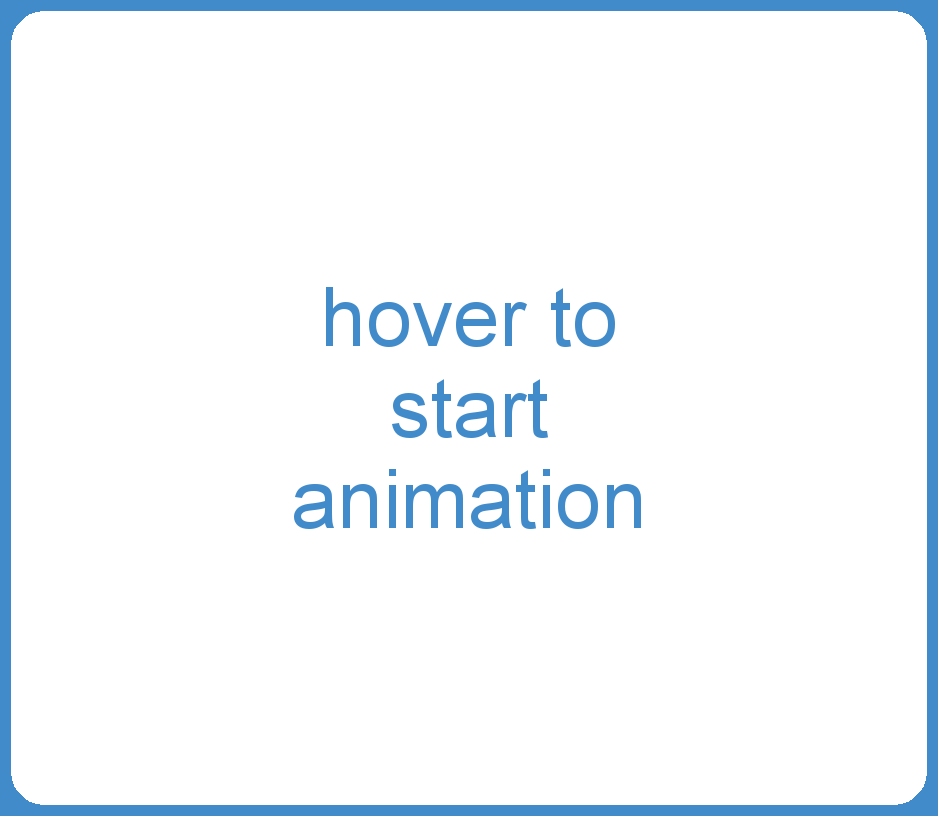
Hover Images
Hover images are defined in the tab page “Advanced” in the image edit pop-up. (select your image, click on the image edit button with the tree, select tab Advanced)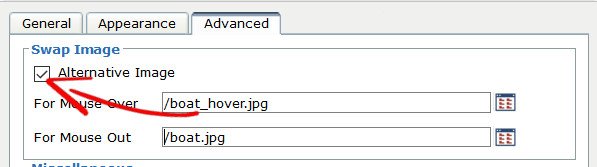
By selecting “Alternative Image” two options are enabled: “For Mouse Over” and “For Mouse Out”.
The first option contains the url of the image that is shown on hover. The second option is for the image on mouse out.
The animation below shows setting a hover image.